Tuesday, November 27, 2007

UV+IR-UV

IR Sunrise, South Waterfront

The latest experiment with my shiny black UV and IR filters. These were taken with the two together, which -- in theory -- should block most or all UV & visible light, and show only the IR that makes it through both filters.

Feel free to speculate about the yellow-orange color. I really have no idea where that came from, but I rather like it.

IR Sunrise, South Waterfront

IR Sunrise

IR Sunrise

Monday, November 26, 2007

Tanner Springs in Ultraviolet

Tanner Springs (UV)

It was a cold, overcast, near-wintry day, and I went out in the late afternoon. It's hard to imagine more unfavorable circumstances for taking UV photos. But when you have a new toy (i.e. a shiny black UV-pass filter), you always want to go out and play, regardless of the weather.

Given the unfavorable circumstances, I'm reluctant to call these "bad photos", exactly. There wasn't much UV to go around today, so most of these are multi-second exposures, and I didn't bring a tripod so they're all handheld shots. And the subject matter isn't your classic UV fare, with closeups of flowers and such. UV with the camera's digital false color effect looks a bit postnuclear, if you ask me. But it's what I had close at hand. I'm not about to wait until spring. So rather than calling them "bad photos", I prefer to regard them as merely "preliminary results".

I didn't pick Tanner Springs just because it was close, actually. I've seen a few indications that water does interesting stuff in UV, becoming all shiny and reflective. I'm not entirely taken with today's preliminary results, but check out this waterfall for an idea of what I have in mind, ideally. Certainly nothing I did today comes close to that, but someday, perhaps, with more practice and better subject matter...

In any case, there's an interesting piece about UV subject matter here, which is where I found that waterfall photo. The shot from the golf course does look a lot like what I came up with, except a bit brighter and sharper. So I may be on the right track, at least.

Oh, and before anyone gets pedantic about it: I do realize the B+W 403 filter leaks a bit of infrared, such that these aren't completely pure UV. I took an IR photo for comparison, which you'll find down toward the bottom. You can't miss it, with the classic IR snow-grass effect and all that. The UV ones look nothing like it. I've been reading up a bit, and it appears that what I really need now is something called a BG38 filter, which supposedly cuts substantially all the IR while passing the UV, pretty ideal when used along with a 403. Or you could use it alone and take some fascinating(?) blue-green-ish photos, I suppose.

Tanner Springs (UV)

Tanner Springs (UV)

Tanner Springs (UV)

Tanner Springs (UV)

Tanner Springs (UV)

Tanner Springs (UV)

Tanner Springs (UV)

Tanner Springs (UV)

Tanner Springs (IR)

Sunday, November 25, 2007

More fun with ultraviolet

uv403_uv0_z.jpg

uv403_door_z.jpg

Continuing with the theme of the previous post, here are a few more photos with the fancy new UV & IR filters I bought the other day. What I'm trying to do here is completely nail down the fact that my puny little digital camera can, in fact, see ultraviolet light. Various self-styled experts will tell you it's impossible, their opinions seemingly based on a couple of minutes worth of Googling and zero minutes of actual experimentation.

I took a few photos of more or less the same angle using various filter combinations. The first three were with a B+W 403 on the camera. This filter blocks visible light, and lets through UV and a bit of infrared. The second three were with a Hoya R72 on the camera, which lets infrared through, and blocks visible and ultraviolet. The goal is twofold: First, to show that yes, the camera does detect something with the 403 in place. And second, to show that what it's seeing cannot be just the IR component.

In addition to these two filters, I had a Hoya UV(0), which just blocks UV, and a half-opened window, which blocks even more -- but not all -- UV. I used both, because in the previous post I showed the half-opened window trick using a black light bulb as an improvised filter, and I wanted to demonstrate that the effect is visible with a real UV filter on the camera, and occurs with a known UV-blocking material just like it does with a regular window.

So the top photo is with the UV(0), and the second is with the window. As you can see, the window blocks substantially more UV, which isn't surprising since it's also quite a bit thicker. It's also nobody's idea of an optical-grade material. It should be apparent that the left and right hand sides of both photos are different, both in brightness and in color. The UV(0) and obviously the window look completely transparent in visible light, so the difference must be due to either ultraviolet or infrared.

[Oh, and before anyone accuses me of image manipulation: I did brighten the pics up a bit in GIMP using the Levels tool, since the originals were rather dark and it wasn't easy to tell what was going on. But no color tweaking, and certainly no lightening of individual regions within a photo. Everything's just as it appeared, just a few percent brighter overall.]

uv403_r87_z.jpg

The third photo shows the R72 infrared filter being handheld in front of the camera. I'm not sure what this proves, exactly, but I was curious how it would look. It's black to the naked eye (as is the 403), but I wondered whether there'd be enough IR making it through both filters to make it transparent, or at least non-black in these circumstances. Apparently not, at least not in this photo. Possibly the auto-exposure is to blame, so I'll probably need to take a couple of additional pics with one filter directly on top of the other. I'm not sure what that will prove, precisely, but it might be interesting.

r87_uv403_z.jpg

So photo #4 is the reverse situation, with the R72 on the camera, and the 403 handheld. Black again, just like last time. You might notice what look like a couple of spots of light on the filter -- I'm pretty sure those are reflections off the back, not light passing through it.

r87_uv0_z.jpg

R72 on the camera, UV(0) handheld. This is to see whether the color & brightness differential is visible with purely infrared light. Sure doesn't look like it, does it? Regarding the top two photos, I said that the difference had to be due to either ultraviolet or infrared, and now here's what you get with the UV component removed. So if the difference isn't infrared, and it isn't visible, it must be the ultraviolet. QED, eh?

r87_door_z.jpg

And the same experiment, this time with the half-open window. The non-window part might be just a shade brighter, indicating the window might be blocking a little IR too. But it's nothing like what's shown in photo #2, and there's no color variance that I can see here.

Friday, November 23, 2007

Now Available in Glorious Ultraviolet

Blacklight bulb in ultraviolet

Blacklight bulb in infrared, heavily enhanced

If you're one of the few, the blessed few, the regular readers of this humble blog, you've probably noticed I post infrared photos here pretty often. Ever since I realized you could take infrared pics with a digital camera, I've been sort of mad for it. Once you figure out that your camera can see below the visible spectrum, it's only natural to wonder whether it can see above the visible spectrum too. Or at least it's only natural for me to wonder.

While infrared photos tend toward dramatic landscapes full of treees and puffy clouds, ultraviolet photography is dominated by closeup/macro shots of flowers. Looking at flowers in UV can reveal details you can't see with the human eye, but which bees apparently can see. I remember seeing example photos of this as a kid and wishing I could see in ultraviolet too, or at least take pictures in UV and see the invisible that way. Plus it gives me an excuse to post even more photos of flowers, which are a perennial staple on this blog. Or at least it'll be a good excuse in a few months, once flowers start to bloom out again.

If you search the interwebs for a few minutes, the short answer is that digital ultraviolet photography is either a.) impossible, or b.) prohibitively expensive. The main problem is that ordinary lens glass isn't entirely transparent in ultraviolet frequencies, and becomes increasingly opaque as the wavelengths get shorter. Visible light cuts off around 400 nanometers. Glass, we're told, is mostly opaque by 350nm (the exact value seems to depend on who you talk to). So if you're going to be a serious Real Man photographer about it you'll need to shell out around $5000 for a quartz lens, which transmits down to around 200nm. If you want to go even lower than that, you'll need rather heroic measures, as oxygen becomes opaque around that point. You'll need an evacuated bell jar for your macro shots, large enough to hold your camera. And for landscape work you'll most likely require a spaceship or something. You'll also need a source of short-wavelength ultraviolet light. If you haven't yet left the earth, you'll need your own source of UV light below around ~315nm or so, because that pesky, naughty ozone layer is blocking the sun's UV. Below a certain wavelength, it's always night on earth, effectively, and everything is black (i.e. highly UV-absorbent). The ozone layer is rather handy for the whole "not dying" thing, but photographically it's a bit inconvenient, I guess. Effectively there's a sort of law of diminishing returns in effect here, under which you chase shorter and shorter wavelengths at ever-increasing expense, as the available natural light decreases rapidly. In short, I concluded that a.) I can't afford a hyper-specialized $5000 lens, and b.) I have no desire to mess around with dangerous UV-C lighting, no matter how fabulous the results might be, and c.) I wanted to see if I could pull this off anyway, regardless of what the self-styled experts think.

There is one thing I seem to have done differently than the examples I've seen on the net, in that I'm using a cheap point-n-shoot digital camera instead of an expensive DSLR. As with IR, it seems to be the case that the better camera you have, the better job it does filtering out UV. This is perfectly understandable; 99.9% of camera users don't want UV around messing up their photos, 100% of the time. I always suspected my lil' Canon A520 was detecting UV, as the sky tends to get overexposed and washed out at the slightest provocation. So I think if you want a camera to take digital UV photos, worse is probably better. I haven't tried the UV filter on my super-cheapies, the VuPoint and the Jamcam, just yet, but I expect I'll get around to it fairly soon, and you'll see the results here if they're remotely interesting.

Looking outside in semi-UV.

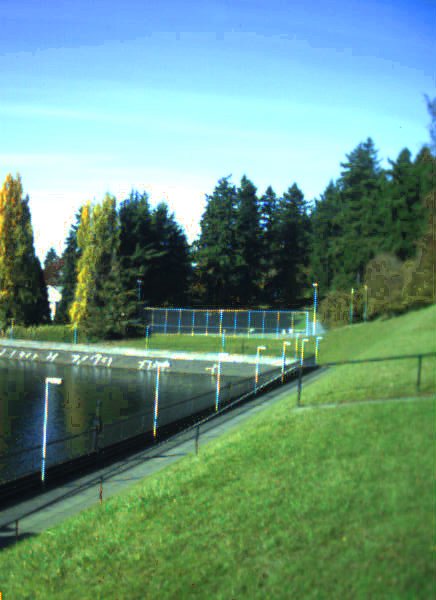
Unlike IR, I don't know of any way you can play with UV without spending any money. Before burning $40 on a filter, I first thought I'd do a quick smoke test to see if it was worth trying. I purchased a black light bulb around Halloween, and I thought, OK, obviously this isn't a pure UV filter since I can see through it, but it has to transmit a disproportionate amount of UV. Hopefully it skews things enough to make UV effects detectable, at least. So I used the bulb at a filter, and pointed it at a partially open window. Normal glass doesn't do a great job transmitting UV, so I figured, ok, show a partially open window, so only half the frame is glass, and see if there's a noticeable difference. See which is brighter. Sure enough, the side without glass was substantially brighter, indicating that something the camera detects is being partially absorbed by the glass. This effect isn't noticeable in visible wavelengths, and I don't think it's noticeable in IR either. Obviously the glass is absorbing something and there aren't really that many candidates out there.

Assuming you can detect UV light, your next issue is being sure you're blocking out everything except UV light. The infrared equivalent was easy -- you just need a couple of strips of developed, unexposed film, tape 'em together and you've got a crude IR filter to get you started. As far as I know there's no equivalent in the UV field. Either you shell out around $40+ for a filter, or you don't. You can try the semi-UV trick I did above, but that's not likely to satisfy anyone, certainly not the hardcore types out there. I took a few pics with the bulb-filter, and they seemed to sort of capture the spirit of UV photos, if there is such a thing, but they weren't quite pure enough. So I broke down and bought the UV filter, a B+W 403. The B+W 403 has an unfortunate trait in that, although it blocks visible light quite well, it does transmit a bit of infrared light too. So I also bought a proper IR-only filter for comparison (Hoya R72), another $40. I figured I'd use it a lot anyway just for IR stuff, so it's really not that huge of an extravagance, I guess. I also needed a 52mm filter adapter for the digicam, Canon part number LA-DC52F, another $18. And if you count the price of a couple of black light bulbs, I've spent a bit over $100 on this project so far. Which is not an insubstantial amount, but to me it's affordable, and $5000 absolutely isn't.

Perhaps you've noticed the slightly defensive tone of this post. I've done a bit of research around the net, and one thing I've noticed is that any mention of ultraviolet photography tends to attract hordes of arrogant, pompous, insufferable blowhard windbags, and they all want to be the first to ridicule you for not buying a $5000 quartz lens like you're supposed to. No quartz lens, no admission to the exclusive UV photo treehouse. Them's the rules. Possibly they'd be better served by spending that $5k on anger management classes, but to each his own, I guess. Want some examples? Read the user comments to these pieces at Instructables, Make, and LifeHacker. Yikes! The worst part is that I get the distinct impression many of the angriest commenters out there have never actually tried it themselves. They simply read it was impossible, somewhere out on the interwebs, and decided the net needed yet another Meme Enforcer.

So I figured that if I wanted to demonstrate it was possible for less than the price of a used car, I ought to be somewhat painstaking about it. I don't want to claim it if I can't prove it beyond a reasonable doubt. I had a cheap digital point-n-shoot camera from 2004, a UV (and a little IR) filter, and IR (and no UV) filter, and a fluorescent blacklight bulb, which emits plenty of UV and almost no IR. And I did this at night, so the sun wouldn't mess with my results. I'm not trying to make art today, I'm not trying to argue it's an efficent process or anything. I'm simply trying to prove it's possible. If that requires artificial conditions, so be it.

The logic: I have a camera that detects visible light, some UV, and some IR, and that's apparently all. So to my knowledge, any light it sees must be either visible, UV, or IR. I have a known source of light, which puts out a great deal of UV, and very little IR, I take a photo with the UV filter, and it comes out fairly bright. But that could be due to the filter's IR leakage. To eliminate the possibility that it's IR, take the same photo of the same UV source using the IR-only filter. Note how much dimmer it is. The original photo was pitch black, and I had to enhance it a great deal to make the blacklight bulb visible. I think IR is out. Then look through both filters at the light source. Note that both transmit a very small amount of dark red visible light. The B+W 403 filter is visibly darker, and yet takes a brighter image of the bulb than the R72 filter does. Certainly the 403 doesn't transmit enough visible light to account for the rather sharp images it allows. UV is the only remaining candidate, by process of elimination.

So the top photo is the black light bulb with the B+W 403 filter on. Below it is the same black light bulb with the IR filter on, and the IR photo is heavily enhanced so you can see the bulb. The original was basically pure black, even though it was a longer exposure with a wider aperture. Fluorescent bulbs don't put out a lot of IR, so what you're seeing there might even be ambient light from elsewhere in the room reflecting off the bulb. Below, with the 403 filter again, a regular fluorescent bulb.

Fluorescent bulb in ultraviolet

One disappointing thing is that I probably won't be able to use the ol' Holga for UV work, due to the plastic lens. Not all plastic is created alike when it comes to UV transmission, and I understand that acrylic (aka Plexiglas (tm), aka Lucite (tm) ) actually does a better job than glass in some respects, transmitting UV down to ~300nm. Other plastics tend to have a cutoff around 400nm, making them exactly as bad as the human eye in the UV department. And sadly, I hear the Holga's lens is polycarbonate plastic, not acrylic, and polycarbonate cuts off around ~400nm, making it no better than the human eye for this sort of thing. Oh, well. I should point out that I've never tried the acrylic lens option myself,

A fun thing with digital is you can try to prototype something you want to do on film without wasting any film. Film is, if anything, more sensitive to UV than digital is, so if digital works, film probably will too, and digital kind of looks like it works. I hear the very best thing to use for UV is old-sk00l, orthochromatic, blue-sensitive-only film, if you can find it.

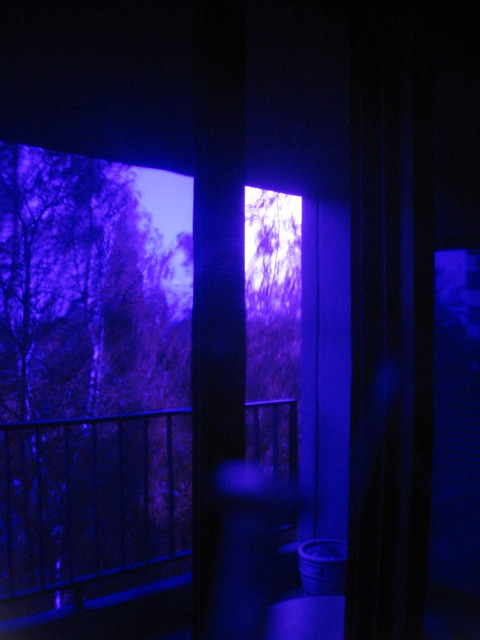
Below, another pair of UV vs. IR shots of the same subject. The UV shot is just semi-UV, since I was still using the black light bulb as a filter at that point.

Downtown Portland in semi-UV

Downtown Portland in IR

Resources:
  • The UV section at Naturfotograf shouldn't be missed. Mr. Rorslett is one of the lucky few to own a quartz UV-Nikkor lens, so the site is a bit quartz-centric, but hey. Use it if you've got it. This site may be where the quartz-only meme got going, although I think this was probably unintentional.

  • There's another good source of info at RMIT University in Melbourne, Australia. It focuses on using UV for medical photography, but the technical side should be handy for anyone with an interest in the subject.

  • More info, with an enjoyably technical bent, at Beyond Visible.

  • In particular, here are pages on filter transmission at RMIT and Beyond Visible.

  • More digital UV experimentation, from a prof at the Rochester Institute of Technology.

  • A tutorial piece at Photo.net.

  • You'll probably also want to check out pages at NatureBlink, Hank Hogan's pages on Ultraviolet Nature Photography, and some nice photos by Fumio Yozokawa. WJ's Photo Homepage has a few bits about UV, and much more about infrared.

  • Info about the legendary 105mm UV-Nikkor quartz lens.

  • A page on UV lens alternatives.

Updated 7/09: Linkage in this IRC log from last April, interspersed with a bunch of chatter about philosophy and assorted other topics.

Wednesday, November 21, 2007

Mt. Tabor in glorious lo-fi digital

Mt. Tabor

Mt. Tabor

More photos from my multi-camera-totin' "expedition" over to Mt. Tabor. I won't rehash the rationale for said excursion as I've already covered it here. Let's just say it helped with current events. In any case, this batch was taken with that cheesy old Jamcam 2.0 I picked up a while back for a whopping six dollars. As with all Jamcam photos, they needed substantial GIMP processing. I don't care what this camera says, the world contains more than just shades of blue, green, and gray. I'm quite sure of it. I also used a bit of unsharp mask on the pics, not that it's obvious. You can only do so much with a 640x480 image, after all.

Mt. Tabor

Mt. Tabor

Mt. Tabor

Mt. Tabor

Tuesday, November 20, 2007

Pics: Bridal Veil Overlook


View Larger Map

Here are a few photos from the overlook at Bridal Veil State Park. Bridal Veil Falls is the main event at the park, and until I visited back in August I didn't realize there was anything else there worth seeing. To get to the spot pictured here, there's a trail blandly marked something like "interpretive trail". Interpretive trails tend to be boring affairs aimed at children and the elderly, with endless signs lecturing you about native wildflowers and so forth. I don't think the signs even mention there's a view, or at least they don't play it up very much. Once you've located the trail and decided to give it a try, it's a brief, flat walk to sheer cliffs overlooking the Columbia. From the parking lot you wouldn't have any idea they were there.

Bridal Veil Overlook

Looking west. The island in the center is known as "Sand Island", for reasons that will become apparent in a subsequent photo.

Bridal Veil Overlook

Looking north at the area called Cape Horn, on the Washington side of the Gorge, home to an extensive trail system that opened several years after I wrote the post you're reading now. I highly recommend it. For posterity, here's how I had described the place back in 2007:

It's a fairly dramatic area with surprisingly little in the way of public facilities. busy SR14 runs over the top and I think there's a viewpoint somewhere up there, but that's about it so far, except for a few unofficial trails that I understand are kind of rough and scary. The land's slowly being acquired from various private owners, so maybe someday there'll be more to see and do over there.
Bridal Veil Overlook

Back in the 19th century, some imaginative soul saw the rounded rocks shown here and named them "The Pillars of Hercules". People just don't do silly romanticized names like they used to. What you see here is actually just one of the pillars. The other's just to the left, now covered by dense trees. When it was named originally, it's likely the area had been clearcut not long before. Victorian-era Oregonians may have been silly and melodramatic and all that, but in the end they were a practical lot, so a bit of dramatic geology wasn't going to stop them from cutting the trees down. In any case, the hidden pillar really isn't a pillar at all, but is part of the cliff face, similar to what I was standing on when I took the photo.

Apparently some people have taken to climbing the pillar you see here. Which I find precisely as incomprehensible as I do climbing anywhere else.

And here's an old photo of the place, circa 1885. Seems that once upon a time the railroad tracks passed through the narrow gap between the pillars instead of curving around the outside like they do now. I suppose even hardheaded railroad engineers were into the whole melodrama thing back in the day.

Bridal Veil Overlook

Bridal Veil Overlook

Bridal Veil Overlook

Bridal Veil Overlook

Bridal Veil Overlook

Bridal Veil Overlook

Bridal Veil Overlook

Bridal Veil Overlook

B+W: Mt. Tabor

Mt. Tabor

More photos from Mt. Tabor, this time in glorious black-n-white. I was up there a couple of weeks ago with a whole bag full of cameras. Partly as a compare and contrast thing, and partly to avoid dwelling on the latest death among friends and family, something I've seen a lot of lately. Well, anything other than zero seems like a lot to me, and now there's been more than one in the last few months, so it's a lot. Instead of freaking out over something I couldn't change, I wandered around taking photos for a while, spending a couple of hours thinking of nothing but light and angles and framing and such. It was nice.

Once all the film cameras were out of film, and the digital ones had their batteries drained, I hoofed it off to the nearby Horse Brass Pub for another kind of forgetting. I may not be a psychologist, but I know what works. At least for me. At least in the short term.

Mt. Tabor

Mt. Tabor

Mt. Tabor

Mt. Tabor

Mt. Tabor

Note the squirrel in the photo above. Next, here's a closer look. A bit too close, in fact, which is why the shot's blurry. I like a nice sharp photo and all that, but I also like not being bitten by rodents, even cute-n-cuddly ones.

Mt. Tabor

Mt. Tabor